Overview
The EmbeddedUI SDK provides view wrappers around the Embedded SDK functions.
A single BeyondIdentityButton handles login, recovery, and credential creation or migration. A BeyondIdentitySettings supplements your app settings screen handling credential creation, recovery or migration as well as the ability to view existing credential information, delete an existing credential or display a QR code to add the credential to another device.
Sample apps are available to explore. Check out Example for the EmbeddedUI SDK.
Installation
Swift Package Manager
From Xcode
- From the Xcode
Filemenu, selectSwift Packages»Add Package Dependencyand add the following url:
https://github.com/gobeyondidentity/bi-sdk-swift
- Select a version and hit Next.
- Select the
BeyondIdentityEmbeddedUItarget
From Package.swift
- With Swift Package Manager, add the following dependency to your
Package.swift:
dependencies: [
    .package(url: "https://github.com/gobeyondidentity/bi-sdk-swift.git", from: "<<ios-sdk-embedded-version>>")
]
- Run
swift build
Setup
First, make sure to initialize the SDK. This can be called from your AppDelegate or SceneDelegate.
initializeBeyondIdentity(
     biometricAskPrompt: viewModel.biometricAskPromptText,
     clientID: viewModel.confidentialClientID,
     redirectURI: viewModel.redirectURI,
     logger: logger
)
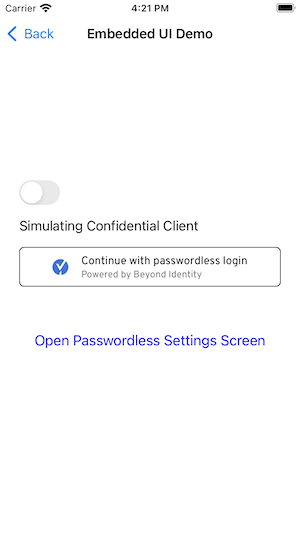
BeyondIdentityButton
To configure a BeyondIdentityButton initialize either an .authorize or .authenticate AuthFlowType and a BeyondIdentityConfig.
BeyondIdentityButton(
     authFlowType: .authenticate(callback: authenticationCompletion),
     config: BeyondIdentityConfig(
         supportURL: viewModel.supportURL,
         signUpAction: signUpAction,
         recoverUserAction: recoverUserAction
     )
)
If you wish to create your own custom button, call the continueWithBeyondIdentity from your own button to present custom Beyond Identity UI and begin the Passwordless experience.
myCustomButton.addTarget(self, action: #selector(signIn), for: .touchUpInside)

@objc private func signIn(){
    if let parentVC = self.parentViewController {
        continueWithBeyondIdentity(for: parentVC, authFlow: authFlow, config: config)
    }
}
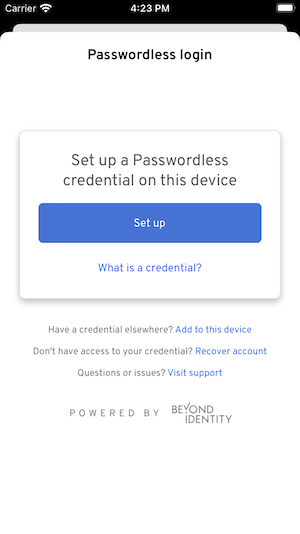
The BeyondIdentityButton first determines if a credential exists on the device. If a credential exists and the user wishes to log in, then the button will start the login process by either calling authorize or authenticate depending on the configured FlowType. On success, either an AuthorizationCode or TokenResponse will be returned to the completionCallback. If an AuthorizationCode is returned then it will need to be used to make a token exchange. A TokenResponse contains both an idToken with user information and an AccessToken that is used to log the user in.
If a credential does not exists then the user has three options:
1. Create a new credential
If the user wishes to create a new credential or replace the current credential with a new one, UI is provided up until registration. Instead, the signUpAction in the BeyondIdentityConfig will be invoked. This action should navigate the user to a registration screen where the Beyond Identity create users API is called. An email will be sent to the user to register a new credential.
func signUpAction() {
        navigationController?.pushViewController(
            SignUpViewController(registrationURL: viewModel.registrationEndpoint),
            animated: true
        )
}
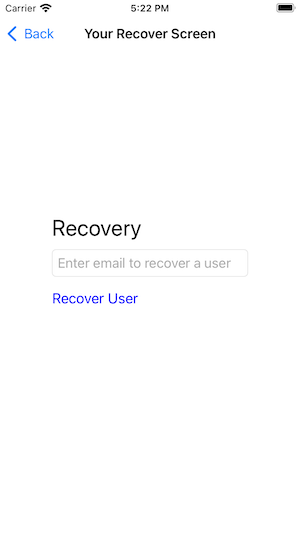
2. Recover an existing credential
If the user wishes to recover an existing credential, UI is provided up until recovery. Instead, the recoverUserAction in the BeyondIdentityConfig will be invoked. This action should navigate the user to a recover screen where the Beyond Identity recover-user API is called. An email will be sent to the user to recover an existing credential.
func recoverUserAction() {
        let recoverVC = RecoverViewController(recoveryURL: viewModel.recoverUserEndpoint)
        navigationController?.pushViewController(
            recoverVC,
            animated: true
        )
}
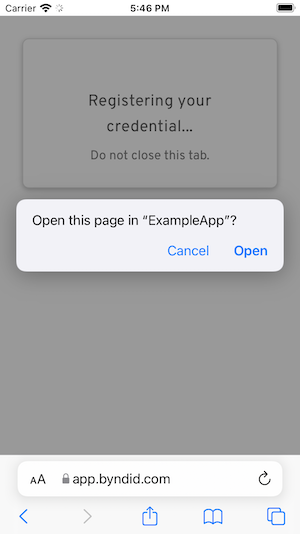
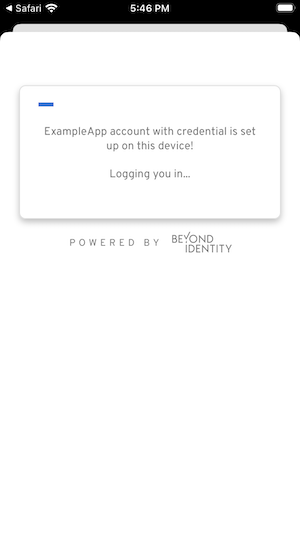
Complete Registration or Recovery
Call registerCredentialAndLogin from your AppDelegate or SceneDelegate to intercept the URL after the user taps on the registration or recovery email. After a Credential is set up, a login process will begin by either calling authorize or authenticate depending on the configured FlowType. On success, either an AuthorizationCode or TokenResponse will be returned to the completionCallback. If an AuthorizationCode is returned then it will need to be used to make a token exchange. A TokenResponse contains both an idToken with user information and an AccessToken that is used to log the user in.
func scene(_ scene: UIScene, openURLContexts URLContexts: Set<UIOpenURLContext>) {
        if let url = URLContexts.first?.url {

            registerCredentialAndLogin(
                  window: window,
                  url: url,
                  config: RegisterConfig(
                        authFlowType: .authenticate(
                            callback: { tokenResponse in
                                print(tokenResponse)
                            }
                         ),
                         supportURL: vm.supportURL,
                         recoverUserAction: recoverUserAction
                  )
             )

        }
}
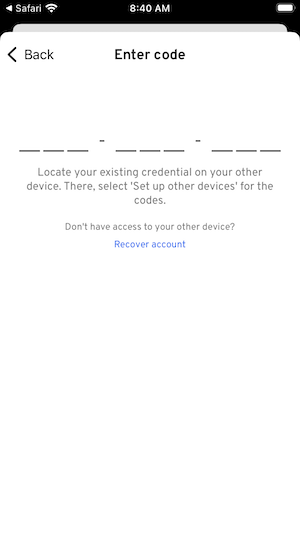
3. Add a credential from another device
UI is provided around scanning a QR code or entering a code to import a credential from another device.
On error screens and throughout the UI, the user will have the option to visit your support page or contact your support email with the provided supportURL
BeyondIdentityConfig(
        supportURL: viewModel.supportURL,
        signUpAction: signUpAction,
        recoverUserAction: recoverUserAction
)
BeyondIdentitySettings
To configure the BeyondIdentitySettings initialize a BeyondIdentityConfig with the presenting viewController.
openBeyondIdentitySettings(
    with: self,
    config: BeyondIdentityConfig(
        supportURL: viewModel.supportURL,
        signUpAction: signUpAction,
        recoverUserAction: recoverUserAction
    )
)
openBeyondIdentitySettings will present the Beyond Identity Settings screen inside your app. If a credential already exists on the device, the Settings screen will display options to the user to view credential details, delete a credential or display a QR code to add this credential to another device.
If a credential does not exists then the user has three options:
1. Create a new credential
If the user wishes to create a new credential the signUpAction in the BeyondIdentityConfig will be invoked. This action should navigate the user to a registration screen where the Beyond Identity create users API is called. An email will be sent to the user to register a new credential.
func signUpAction() {
        navigationController?.pushViewController(
            SignUpViewController(registrationURL: viewModel.registrationEndpoint),
            animated: true
        )
}
2. Recover an existing credential
If the user wishes to recover an existing credential, UI is provided up until recovery. Instead, the recoverUserAction in the BeyondIdentityConfig will be invoked. This action should navigate the user to a recover screen where the Beyond Identity recover-user API is called. An email will be sent to the user to recover an existing credential.
func recoverUserAction() {
     let recoverVC = RecoverViewController(recoveryURL: viewModel.recoverUserEndpoint)
     navigationController?.pushViewController(
         recoverVC,
         animated: true
     )
}
3. Add a credential from another device
UI is provided around scanning a QR code or entering a code to import a credential from another device.
On error screens and throughout the UI, the user will have the option to visit your support page or contact your support email with the provided supportURL
BeyondIdentityConfig(
     supportURL: viewModel.supportURL,
     signUpAction: signUpAction,
     recoverUserAction: recoverUserAction
)
Custom Beyond Identity UI Button
Call this function from your own button to present custom Beyond Identity UI and begin the passwordless experience.
- Parameters:
- parentViewController: The ViewController that will present Beyond Identity custom UI.
- authFlow: Your app's authentication flow
- config: A structure holding required information and callbacks
Embedded.shared.getCredentials { result in
    var viewController: ViewController? = nil

    switch result {
    case let .success(credentials):
        if credentials.isEmpty {
            viewController = SignUpViewController(
                authType: authFlow,
                config: config,
                type: .noCredential
            )
        } else if credentials.count == 1 {
            viewController = CredentialExistsViewController(
                authFlowType: authFlow,
                config: config
            )
        } else {
            // show selection, currently not supported
            break
        }

        if let rootViewController = viewController {
            parentViewController.present(CustomNavigationController(rootViewController: rootViewController), animated: true, completion: nil)
        }
    case let .failure(error):
        print(error)
    }

}