Overview
Embed Passwordless Authentication into your Android app with out of the box view wrappers
Overview
The EmbeddedUI SDK provides view wrappers around the Embedded SDK functions.
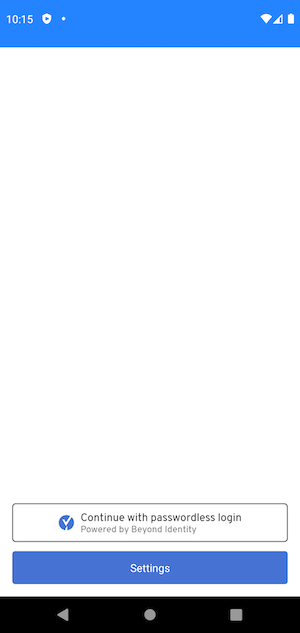
A single BeyondIdentityButton handles login, recovery, and credential creation or migration. A BeyondIdentitySettings supplements your app settings screen handling credential creation, recovery, or migration as well as the ability to view existing credential information, delete an existing credential, or display a QR code to add the credential to another device.

Sample App
Sample apps are available to explore. Check out Example for the EmbeddedUI SDK.
Installation
Gradle
To enable the retrieval of Cloudsmith hosted packages via Gradle, we need to add the Cloudsmith repository to the root/build.gradle file.
repositories {
    maven {
        url "https://packages.beyondidentity.com/public/bi-sdk-android/maven/"
    }
}
After the repository is added, we can specify the Beyond Identity dependencies.
dependencies {
    implementation 'com.beyondidentity.android.sdk:embedded-ui:<<android-sdk-embedded-version>>'
}
Configuration
// Use when OIDC client is configured as public client
private val myClientConfig = PublicClientData(
  clientId = "client-id",
  redirectUri = "https://mydomain.com/redirect",
)

// Use when OIDC client is configured as confidential client
private val myClientConfig = ConfidentialClientData(
  clientId = "client-id",
  redirectUri = "https://mydomain.com/redirect",
  scope = "openid",
)

EmbeddedUiConfig.config = Config(
  appDisplayName = "Acme Inc.",
  supportUrlOrEmail = "https://www.acme.com/support", // url or email
  authenticationData = myClientConfig,
)
BeyondIdentityButton
The BeyondIdentityButton first determines if a credential exists on the device. If a credential exists and the user wishes to log in, then the button will start the login process by either calling EmbeddedSdk.authorize or EmbeddedSdk.authenticate depending on the configured authenticationData. On success, either an BiEvent.Authentication containing TokenReponse or BiEevent.Authorization containing AuthorizationCode will be posted. If an AuthorizationCode is returned then it will need to be used to make a token exchange. A TokenResponse contains both an IdToken with user information and an AccessToken.
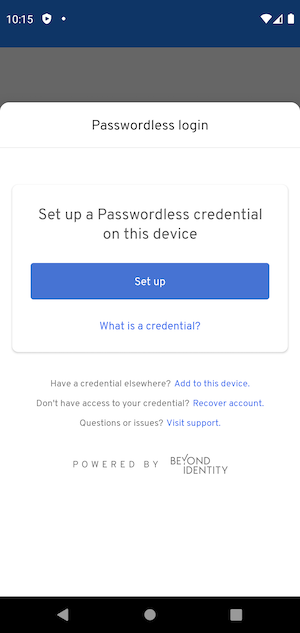
If a credential does not exist then the user has three options:
1. Create a new credential
If the user wishes to create a new credential or replace the current credential with a new one, UI is provided up until registration. Instead, BiEvent.CredentialSetup is posted. This action should navigate the user to a registration screen provided by the developer where the Beyond Identity create user API is called. An email will be sent to the user to register a new credential.
//...
class MyClass : AppCompatActivity(), BiObserver {
      override fun onEvent(event: BiEvent) {
        when (event) {
          CredentialSetup -> {
                startActivity(Intent(this, MyRegistrationActivity::class))
            }
        }
      }
}
//...

2. Recover an existing credential
If the user wishes to recover an existing credential, UI is provided up until recovery. Instead, BiEvent.CredentialRecovery will be posted. This action should navigate the user to a recovery screen where the Beyond Identity recover-user API is called. An email will be sent to the user to recover an existing credential.
//...
class MyClass : AppCompatActivity(), BiObserver {
      override fun onEvent(event: BiEvent) {
        when (event) {
          CredentialRecovery -> {
                startActivity(Intent(this, MyRecovryActivity::class))
            }
        }
      }
}
//...
Complete Registration or Recovery
To intercept the registration link an IntentFilter needs to be set up.
<activity
    android:name=".MyActivity"
    android:exported="true">
  <intent-filter>
    <action android:name="android.intent.action.VIEW" />

    <category android:name="android.intent.category.DEFAULT" />
    <category android:name="android.intent.category.BROWSABLE" />
    <!-- !WARNING! Use verified app links (https://yourdomain.com) vs deep links. -->
    <!-- Accepting URIs with custom schemes "my-app://home” can be intercepted by other apps -->

    <!-- Needs to match the register redirect uri configred for your client -->
    <data
    android:host="myhost"
    android:path="/register"
    android:scheme="myscheme" />
  </intent-filter>
</activity>
When the data is intercepted, pass it to the BeyondIdentityActionHandlerFragment and display it to the user.
intent.data?.let { registerUri ->
    val actionHandlerFragment = BeyondIdentityActionHandlerFragment
    .newInstance(actionType = Registration(registerUri = registerUri.toString()))
    // Don't forget the TAG
    actionHandlerFragment.show(supportFragmentManager, BeyondIdentityActionHandlerFragment.TAG)
}
After the Credential is set up, a BiEvent.CredentialRegistered will be posted. EmbeddedSdk.authorize or EmbeddedSdk.authenticate depending on the configured authenticationData will be invoked. On success, either an BiEvent.Authentication containing TokenReponse or BiEevent.Authorization containing AuthorizationCode will be posted. If an AuthorizationCode is returned then it will need to be used to make a token exchange. A TokenResponse contains both an IdToken with user information and an AccessToken.
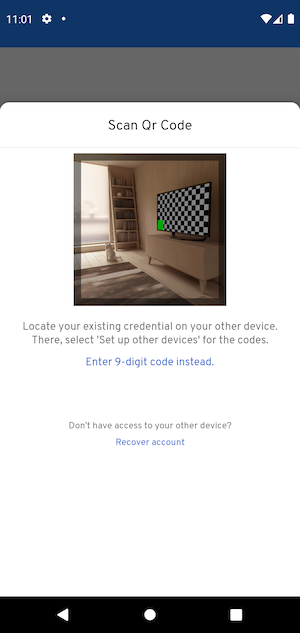
3. Add a credential from another device
UI is provided around scanning a QR code or entering a code to import a credential from another device.
On error screens and throughout the UI, the user will have the option to visit your support page or contact your support email with the provided supportUrl.
BeyondIdentitySettingsFragment
To display the BeyondIdentitySettingsFragment to the user.
settingsButton.setOnClickListener {
    val settingsFragment = BeyondIdentitySettingsFragment.newInstance()
    // Don't forget the TAG
    settingsFragment.show(supportFragmentManager, BeyondIdentitySettingsFragment.TAG)
}
If a credential already exists on the device, the Settings screen will display options to the user to view credential details, delete a credential or display a QR code to add this credential to another device.
If a credential does not exist then the user will see the add credential option that additionally has three options:
1. Create a new credential
If the user wishes to create a new credential or replace the current credential with a new one, UI is provided up until registration. Instead, BiEvent.CredentialSetup is posted. This action should navigate the user to a registration screen provided by the developer where the Beyond Identity create users API is called. An email will be sent to the user to register a new credential.
2. Recover an existing credential
If the user wishes to recover an existing credential, UI is provided up until recovery. Instead,BiEvent.CredentialRecovery will be posted. This action should navigate the user to a recovery screen where the Beyond Identity recover-user API is called. An email will be sent to the user to recover an existing credential.
3. Add a credential from another device
UI is provided around scanning a QR code or entering a code to import a credential from another device.

Observing Events
To observe events happening around the EmbeddedUI SDK, you can register a BiObserver with BiEventBus
class EmbeddedLoginActivity : AppCompatActivity(), BiObserver {
    override fun onCreate(savedInstanceState: Bundle?) {
        BiEventBus.registerObserver(this)
    }

    override fun onDestroy() {
        super.onDestroy()
        BiEventBus.unRegisterObserver(this)
    }

    override fun onEvent(event: BiEvent) {
        when (event) {
            CredentialSetup -> ...
            CredentialRecovery -> ...
            is Authentication -> ...
            is Authorization -> ...
            is CredentialRegistered -> ...
            CredentialDeleted -> ...
            is BiEventError -> ...
          }
    }
}
Custom Beyond Identity UI Button
Call this function from your own button to present custom Beyond Identity UI and begin the passwordless experience.
- @param fm Instance of the [FragmentManager] to control the BottomSheetDialog
EmbeddedSdk.getCredentials { result ->
   result.onSuccess { credentials ->
          if (credentials.isNotEmpty()) {
                BeyondIdentityBeforeAuthFragment
                    .newInstance()
                    .show(fm, BeyondIdentityBeforeAuthFragment.TAG)
            } else {
                val registrationFragment = BeyondIdentityRegistrationFragment.newInstance(false)
                registrationFragment.show(fm, BeyondIdentityRegistrationFragment.TAG)
            }
        }
        result.onFailure { }
    }