Integrate with Expo
This guide provides information on how to set up Beyond Identity as a passwordless authentication provider for a React Native application that uses Expo.
In this guide, you'll:
- Install the React Native SDK
- Configure Beyond Identity as an Identity Provider
- Create an identity and generate a passkey
- Authenticate with a passkey
Prerequisites
-
A Beyond Identity developer account. If you don't have one, reach out to Beyond Identity Support.
-
An Expo application using a development build or prebuild
Install the React Native SDK
To use Beyond Identity as a passwordless authentication provider in your Expo application, you'll need to install the SDK. The SDK is a wrapper around our native SDKs (Android and iOS), so it has custom native code. It provides functionality from passkey creation to passwordless authentication.
Expo Go only directly works with libraries in the Expo SDK, so to leverage the Beyond Identity React Native SDK and other libraries outside of Expo Go, you will need to either use an expo development build or a prebuild.
npx expo install @beyondidentity/bi-sdk-react-native
Add the SDK config plugin to the plugins array of your app.{json,config.js,config.ts}:
{
  "expo": {
    "plugins": [["@beyondidentity/bi-sdk-react-native"]]
  }
}
The SDK requires certain minimum native versions. Set these requirments with expo-build-properties.
npx expo install expo-build-properties
{
  "expo": {
    "plugins": [
      ["@beyondidentity/bi-sdk-react-native"],
      [
        "expo-build-properties",
        {
          "android": {
            "minSdkVersion": 26
          },
          "ios": {
            "deploymentTarget": "13.0"
          }
        }
      ]
    ]
  }
}
Finally, rebuild your app as described in Expo's Adding custom native code guide.
Initialize the React Native SDK
After you've installed the SDK, initialize it so that you can call the Embedded functions. A good place to initialize this is where you register your root component. You can also add a listener to log native events with Embedded.logEventEmitter after initializing.
import { Embedded } from '@beyondidentity/bi-sdk-react-native';

Embedded.initialize(Config.biometricAskPrompt).catch(console.error);

Embedded.logEventEmitter.addListener(
  'BeyondIdentityLogger',
  (message: string) => {
    console.log(message);
  }
);

AppRegistry.registerComponent(appName, () => App);
Set up Beyond Identity as an Identity Provider
To set up Beyond Identity as an Identity Provider, you need to create a Realm to hold identities and configuration. Inside that realm, you'll also create an Application that contains the authentication flow configuration. These can be configured in you admin console that was created for you when you signed up for a developer account.
Create a Realm
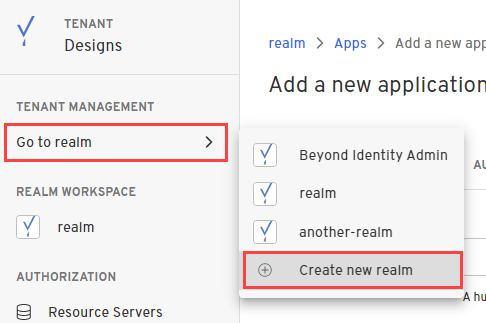
Creating a realm from the Beyond Identity Admin Console is easy.
- In the Admin Console, under Tenant Management, select Go to realm > Create new realm.
-
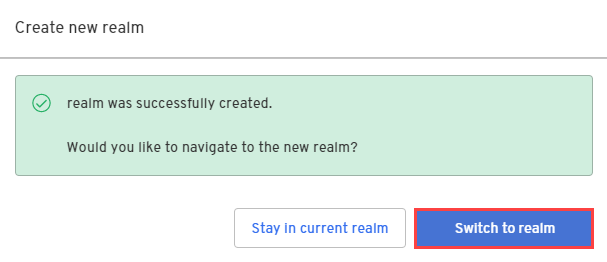
Enter a name for your realm and click Create realm.
-
In the confirmation dialog, switch to the new realm.
Create an Application
- From the Admin Console, under Authentication, select Apps > Add new app.

- Give your application a name.
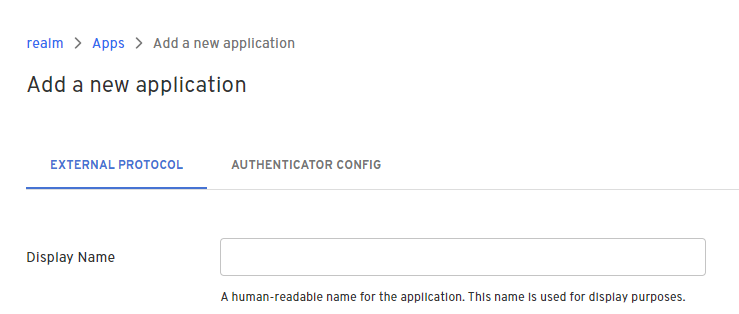
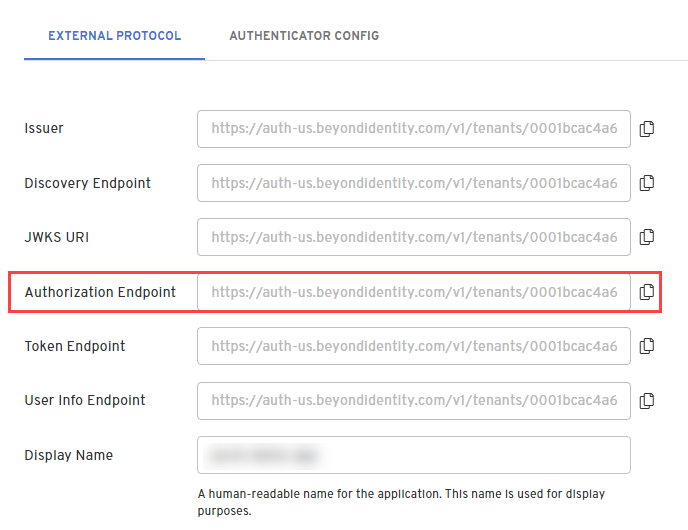
- On the External Protocol tab, use the following values to complete this tab.
| Property | Value |
|---|---|
| Protocol | OIDC
|
| Client Type | Confidential
|
| PKCE | S256
|
| Redirect URIs | Use your application's App Scheme or Universal URL. If you are using an app scheme, your redirect URI may follow the pattern: myapp:// Follow Expo's deep linking guide and linking to your development build |
| Token Endpoint Auth Method | Client Secret Post |
| Grant Type | Authorization Code
|
| All other options | Use the default values for the remaining options |
- Click the Authenticator Config tab and use the following values.
| Property | Value |
|---|---|
| Configuration Type | Embedded SDK |
| Invocation Type | Automatic or Manual |
| Invoke URL | Use your application's App Scheme or Universal URL. |
| Trusted Origin | Use your application's App Scheme or Universal URL. |
- Click Submit to save the new app.
Create an Identity and generate a passkey
Once you have an application in the admin console you are ready to provision users in your realm's directory, generate passkeys, and handle those passkeys in your application.
Create an Identity
Creating a user can be done either in the admin console or through an API. This guide will use the admin console.
-
From the Admin Console, under Directory, select Identities > Add identity.
-
Enter the name, username, and email of the new identity you're adding.

- Click Add Identity.
For more information about identities, see Directory.
Generate a passkey
Once you have an identity you can generate a passkey. This step can also be done either in the admin console or through an API.
-
In the Admin Console, under Directory, select Identities.
-
Select the identity you want to bind a passkey to and click Add a passkey.
-
Select the app and then select Send an email to user.
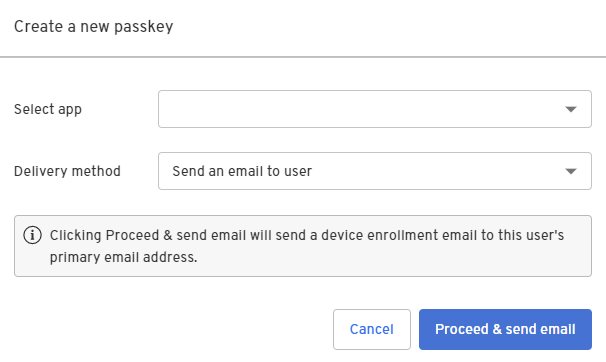
- Click Proceed & send email.
A device enrollment email is sent to your user's primary email address with a link to create their passkey. Clicking or tapping the link redirects your user to the Beyond Identity Cloud. The Beyond Identity Cloud then looks up the Authenticator Config associated with that passkey creation link. Finally, it redirects your user to your application using the Authenticator Config's Invoke URL specified.
For more information, Add a passkey.
Bind passkey to device
When the user clicks or taps the link in the enrollment email, they are redirected to your application. Links that launched your app can be observed using Linking.
-
Follow Expo's deep linking guide and linking to your development build.
-
Register a scheme in your Expo config under the scheme key.
{
  "expo": {
    "scheme": "myapp"
  }
}
- Intercept the link from the enrollment email. The link that is redirected to your application will have the
/bindpath appended to your Invoke URL and several other query parameters.
$invoke_url/bind?api_base_url=<api_base_url>&tenant_id=<tenant_id>&realm_id=<realm_id>&identity_id=<identity_id>&job_id=<job_id>&token=<token>
- Pass the link from the enrollment email into the SDK to complete the binding process.
You can validate the incoming URL with isBindPasskeyUrl. Upon success, a private key will have been created in the device's hardware trust module and the corresponding public key will have been sent to the Beyond Identity Cloud. At this point the user has a passkey enrolled on this device.
import { Embedded } from '@beyondidentity/bi-sdk-react-native';
import * as Linking from 'expo-linking';

export default function App() {
  const url = decodeURI(Linking.useURL());

  const isBindUrl = await Embedded.isBindPasskeyUrl(url)

  if (isBindUrl) {
    const bindResponse = await Embedded.bindPasskey(bindingLink);
    console.log(bindResponse);
  }
}
Authenticate with a passkey
Once you have one passkey bound to a device, you can use it to authenticate, which you'll do below using the Automatic or Manual method.
Craft an Authorization URL
Crafting an authorization URL is the first step in the authorization flow.
- In the Admin Console, under Apps, select the External Protocol tab, copy the Authorization Endpoint value and add it to the query parameters:
https://auth-$REGION.beyondidentity.com/v1/tenants/$TENANT_ID/realms/$REALM_ID/applications/$APPLICATION_ID/authorize?
response_type=code
&client_id=$APPLICATION_CLIENT_ID
&redirect_uri=$REDIRECT_URI
&scope=openid
&state=$STATE
&code_challenge_method=256
&code_challenge=$PKCE_CODE_CHALLENGE
-
Copy and paste the Application Client ID to the query parameters.
-
Copy and paste the Redirect URI, which is your application's App Scheme or Universal URL, to the query parameters.
-
Set the PKCE (code_challenge_method) to S256 or Plain. The PKCE code challenge methods supported for applications are defined by RFC-7636.
Note that the following query parameters includes PKCE as it is recommeded, but optional. If you send an authorization request with PKCE, you must store the hash of the code_challenge so that it can be passed to the token exchange endpoint later as a code_verifier.
- Generate a random string from your application for STATE value and is returned back to you in the response.
The STATE parameter mitigates CSRF attacks by embedding a unique value for each authentication.
Authenticate
There are two ways to authenticate depending on your Application Config's Invocation Type.
- Automatic
- Manual
- Automatic
- Manual
If you select Automatic, Beyond Identity does the heavy lifting for you. If you initiate an OAuth2.0 request and specify the Invoke URL correctly, we'll get the Beyond Identity authentication URL to where it needs to be inside your native app. A 302 redirect is returned in response to your app's OIDC request, causing the user agent to automatically redirect to the authentication URL.
To handle a web browser based authentication you can use Expo's Auth Session.
The response from useAuthRequest hook does not need to be of type 'success'. It's sufficient if it has a url becasue the state value is stored in a JWT in the URL 'request' paramater. The URL is validated through the Beyond Identity Embedded SDK.
import * as React from 'react';
import {
  makeRedirectUri,
  useAuthRequest,
  useAutoDiscovery,
} from 'expo-auth-session';
import { Button } from 'react-native';
import { Embedded } from '@beyondidentity/bi-sdk-react-native';

export default function App() {
  // Endpoint
  const discovery = useAutoDiscovery(
    `https://auth-${REGION}.beyondidentity.com/v1/tenants/${TENANT_ID}/realms/${REALM_ID}/applications/${APPLICATION_ID}`
  );

  // Request
  const [request, response, promptAsync] = useAuthRequest(
    {
      clientId: `${CLIENT_ID}`,
      scopes: ['openid'],
      redirectUri: makeRedirectUri({
        scheme: 'your.app',
      }),
    },
    discovery
  );

  React.useEffect(() => {
    const authenticate = async (url) => {
      // Display UI for user to select a passwordless passkey if there are multiple.
      const passkeys = await Embedded.getPasskeys();

      if (await Embedded.isAuthenticateUrl(url)) {
        // Pass url and a selected passkey ID into the Beyond Identity Embedded SDK authenticate function
        const { redirectUrl } = await Embedded.authenticate(
          url,
          passkeys[0].id
        );
      }
    };

    if (response?.url) {
      authenticate(url);
    }
  }, [response]);

  return (
    <Button
      disabled={!request}
      title="Passwordless Login"
      onPress={() => {
        promptAsync();
      }}
    />
  );
}
If you select Manual, you'll have a lot more control and flexibity when redirecting to your native app. For example, you can write your own intelligent routing layer using the Beyond Identity authentication URL to authenticate against passkeys.
The authentication URL is returned to you as part of a JSON response. No redirects are needed and won't require authentication through a web service. The result is a completely silent OAuth 2.0 authentication using passkeys. Since the challenge is packaged as part of the authentication URL, the URL will result in the same behavior as the Automatic Invocation Type.
import * as React from 'react';
import { Button } from 'react-native';
import { Embedded } from '@beyondidentity/bi-sdk-react-native';

export default function App() {
  async function authenticate() {
    const BeyondIdentityAuthUrl = `https://auth-${REGION}.beyondidentity.com/v1/tenants/${TENANT_ID}/realms/${REALM_ID}/applications/${APPLICATION_ID}/authorize?response_type=code&client_id=${CLIENT_ID}&redirect_uri=${URI_ENCODED_REDIRECT_URI}&scope=openid&state=${STATE}&code_challenge_method=S256&code_challenge=${PKCE_CODE_CHALLENGE}`;

    let response = await fetch(BeyondIdentityAuthUrl, {
      method: 'GET',
      headers: new Headers({
        'Content-Type': 'application/json',
      }),
    });
    const data = await response.json();

    // Display UI for user to select a passwordless passkey if there are multiple.
    const passkeys = await Embedded.getPasskeys();

    if (await Embedded.isAuthenticateUrl(data.authenticate_url)) {
      // Pass url and selected Passkey ID into the Beyond Identity Embedded SDK authenticate function
      const { redirectUrl } = await Embedded.authenticate(
        data.authenticate_url,
        passkeys[0].id
      );
    }
  }

  return <Button title="Passwordless Login" onPress={authenticate} />;
}
Token Exchange
Calling the token endpoint is the second step in the authorization flow and usually happens in your backend if your application's Client Type is Confidential.
Parse the redirectUrl returned when calling the function Embedded.authenticate for a code in the query parameters and then exchange that code for an access token.
For more information on code for token exchange with a Beyond Identity app, see call the token endpoint for token exchange.