Add new app
An application in the Beyond Identity Cloud represents an app, such as a Todo-List iOS or AcmeCorp Android app. You'll create applications within a realm to configure your OAuth or OIDC flows. A realm contains multiple applications, and an application utilizes the realm's directory, policy, events, and branding objects.
Applications contain client and token configurations that allows you to configure passkey binding and authentication in your mobile/web apps. Each application is tied to a single authenticator type (Hosted Web or Embedded SDK). You can create an application through the Admin Console or via the Beyond Identity API.
There are two scenarios for your apps:
| Scenario | When to use |
|---|---|
| One application per platform | One admin console application is created per app on each platform your app supports (iOS, Android, Web, etc.). This approach is easier to configure upfront and provides flexibility regarding platform-specific configurability. However, generating passkey binding links across platforms can be more challenging. |
| One application for all platforms | One admin console application is created for your app across all platforms you support. This approach is more difficult to configure upfront because it requires building a web routing layer to redirect passkey binding links appropriately. However, generating passkey binding links across platforms makes it easier to accomplish a more seamless experience. |
Prerequisites
You'll need to have a developer account, which comes with the Beyond Identity Admin Realm and Beyond Identity Management API app.
Admin Console
An application can be created from the Beyond Identity Admin Console.
Most of the time you will want to create a new application in a different realm other than your Beyond Identity Admin Realm. Applications created in the Beyond Identity Admin Realm default to the Client Credentials grant which is used for applications requesting access outside of the context of a user. Applications created in another realm default to the Authorization Code grant which is used by users requesting access. If you need guidance, visit Create a realm.
- From the Admin Console, under Authentication, select Apps > Add new app.

- Give your application a name.
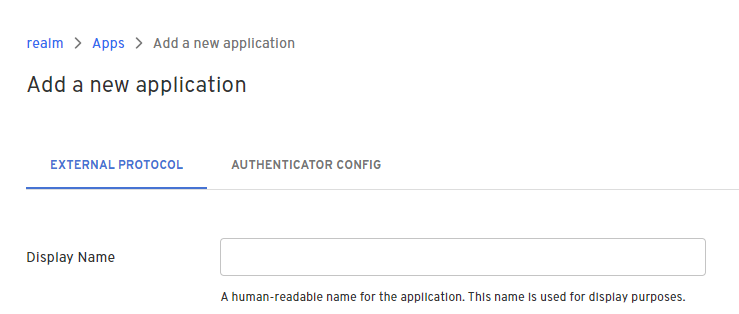
External Protocol Tab
Configure your application's basic settings.
After saving, the values entered will be used to generate OIDC configuration endpoints for your application as well as your Client ID and Client Secret.
The application's External Protocol settings determine how tokens should be requested, what tokens issued for the app look like, and how they should be validated.
Client Configuration
| Setting | Impact |
|---|---|
| Protocol | Determines which protocol flow the app must use to request tokens:
|
| Client Type |
|
| PKCE |
|
| Redirect URIs | A list of valid URIs to redirect the resource owner's user-agent to after completing its interaction with the authorization server. See Section 3.1.2 for more information. |
| Token Endpoint Auth Method |
|
| Grant Type |
|
| Resource Server | If the app is linked to a resource server, the resource server determines the scopes the app can be allowed to issue. |
| Token Format | The two options for token format are Self-Contained and Referential. The difference between these two options impacts how the tokens will be validated. Self-Contained tokens can be validated offline because they contain all of the validation information. Referential tokens require a call to the introspection endpoint for validation. |
Token Configuration
| Setting | Impact |
|---|---|
| Allowed Scopes | If the app is configured with a Resource Server, then this setting specifies the scopes allowed to be included in tokens for this application. The allowed scopes can match or be a subset of the Resource Server scopes |
| Expires | Token lifetime in seconds |
| Subject | Property of a principal which is used to fill the subject of a token issued for this application. |
| Token Signing Algorithm | Signing algorithm to use for an application token. The only allowable value at present is RS256. |
Refresh Token Configuration
| Setting | Impact |
|---|---|
| Enable Refresh Tokens | When enabled, the token response JSON object will contain an additional field called refresh_token, similar to RFC6749#4.1.4. |
Authenticator Config Tab
Select the authenticator configuration type.
- Hosted Web
- Embedded SDK
Select the Hosted Web option if you want Beyond Identity to do the heavy lifting. This option requires less configuration and code because Beyond Identity handles the end-user authentication via a redirect.
Hosted Web Authenticator comes preconfigured with the following values:
- Invocation Type: automatic
- Invoke URL: https://auth-{REGION}.beyondidentity.com/authenticator/
- Trusted Origin: [https://auth-{REGION}.beyondidentity.com/authenticator/]
- Authentication Profile: The Authentication Profile allows you to customize the authentication flow for new or returning users.
Email verification for sign-up and new browser login
This configuration allows you to customize the authentication flow for user registration. This includes users who are registering for the first time or for the first time on a new browser, which includes browsers on the same device or a different device.
Currently the following authentication factors are supported and more are coming soon:
-
One-time password
Verify email with OTP when an end user signs up or logs in on a new browser.
Authentication method for returning login
This configuration allows you to customize the authentication flow for user login.
Currently, the following authentication factors are supported and more are coming soon:
-
Hardware-bound passkey (Recommended)
This option generates a hardware key within your device's trusted execution environment (TEE).
Hardware-bound passkeys support biometric step-up during authentication. Available on Chrome and Edge.
Select fallback method for when a browser isn’t supported:
-
Software-bound passkey (Recommended)
Use software-bound passkey when a browser doesn’t support hardware-bound passkey.
-
One-time password
Use OTP when a browser doesn’t support hardware-bound passkey.
-
-
Software-bound passkey
This option generates a passkey securely created within the browser's context.
Software-bound passkeys do not support biometric step-up during authentication.
-
One-time password
Authenticate with OTP when an end user returns to log in on a browser previously used.
Select the Embedded SDK option if you want to custom-build your end-user authentication experience. This option requires more configuration and code:
- Set an Invocation Type to specify how an authentication URL is delivered to your application.
Value When to use Automatic You want Beyond Identity to do the heavy lifting for you. If you initiate an OAuth2.0 request and specify the "Invoke URL" correctly, we'll get the Beyond Identity authentication URL to where it needs to be, whether this is inside of a native app or a web application. A 302 redirect is returned in response to your app's OIDC request, causing the user agent to automatically redirect to the authentication url. Manual You want or require a lot more control and flexibity when redirecting to your native/web app. For example: - write your own intelligent routing layer using the Beyond Identity authentication URL
- authenticate against passkeys in your browser on desktop, but use passkeys on your native app on mobile
{Since the challenge is packaged as part of the URL, it behaves the same as the Automatic Invocation Type.
"authenticate_url": "$invoke_url/bi-authenticate?request=<request>"
} - Set an Invoke URL that "points" to where your application is. In the case of a native application (iOS, Android, Flutter, React Native), this is either an App Scheme or an Universal URL / App Link. In the case of a web application, this is just a URL to your web application or a specific page of your web application.caution
While app schemes are generally easier to set up, Universal URLs and App Links are recommended as they provide protection against App Scheme hijacking.
- Set Trusted Origins with your website's URL to add it to a whitelist. By default, cross origin requests are blocked by our server.
Click Submit. You'll be taken to the app page for the new application. Here, you'll be able to a number of things, such as edit the basic and advanced settings or configure the signup/login experience.
API
Before creating an application by API, you must have an API access token. You'll also need to create a Resource Server and an Authenticator Config, which you'll do below. A Resource Server is a namespace for application scopes that are a set of all scopes supported by the application. An Authenticator Config defines the invocation type, invoke URL, and trusted origins.
- Create a Resource Server. A Resource Server is a namespace for application scopes that are a set of all scopes supported by the application.
Use these guidelines to determine the Resource Server settings of your application:
| If your application... | Then... |
|---|---|
| References a Resource Server, | The application can include scopes in issued access tokens. The scopes your app can issue are configured in the allowed_scopes setting and must be equal to or a subset of the resource server's available scopes. |
| Doesn't reference a Resource Server | The application can only be used to provide authentication (identity) but not authorization (access). Therefore, the scopes element in access tokens will be empty. |
| Doesn't need to provide multiple access levels, like admin vs. user, | Does not necessarily need a resource server. |
| Is for minting tokens for access to the Beyond Identity API | You must set your application's Resource Server to Beyond Identity Management API. |
- Curl
- CSharp
- Dart
- Go
- Java
- Node
- Python
- Ruby
- Rust
/resource-servers1 2 3 4 5curl "https://api-$(REGION).beyondidentity.com/v1/tenants/$(TENANT_ID)/realms/$(REALM_ID)/resource-servers" \ -X POST \ -H "Authorization: Bearer $(TOKEN)" \ -H "Content-Type: application/json" \ -d "{\"resource_server\":{\"display_name\":\"$(APPLICATION_DISPLAY_NAME)\",\"identifier\":\"$(APPLICATION_URI)\",\"scopes\":[\"$(SCOPE)\"]}}"
/resource-servers/resource-servers/resource-servers/resource-servers/resource-servers/resource-servers/resource-servers/resource-servers- Create an Authenticator Config and make a note of the Authenticator Config ID.
Follow these guidelines to determine if your use case requires the Authenticator Config ID for creating your application:
| Protocol | Grant Type | Required? |
|---|---|---|
| OAuth | Client Credentials | No |
| OAuth | Authorization Code | Yes |
You'll set the application's Configuration Type, Invocation Type, Invoke URL, and Trusted Origins.
- Curl
- CSharp
- Dart
- Go
- Java
- Node
- Python
- Ruby
- Rust
/authenticator-config1 2 3 4 5curl "https://api-$(REGION).beyondidentity.com/v1/tenants/$(TENANT_ID)/realms/$(REALM_ID)/authenticator-config" \ -X POST \ -H "Authorization: Bearer $(TOKEN)" \ -H "Content-Type: application/json" \ -d "{\"authenticator_config\":{\"config\":{\"type\":\"$(CONFIGURATION_TYPE)\",\"invoke_url\":\"$(INVOKE_URL)\",\"trusted_origins\":[\"$(TRUSTED_ORIGIN)\"],\"invocation_type\":\"$(INVOCATION_TYPE)\"}}}"
/authenticator-config/authenticator-config/authenticator-config/authenticator-config/authenticator-config/authenticator-config/authenticator-config/authenticator-config- Create an application using at least the Authenticator Config ID, specifically if your application's
grant_typeis set to authorization_code. The Resource Server ID is optional.
You'll set the application's Display Name, Client Type (confidentiality), Token Configuration, and one ore more redirect URIs.
There are two options available for confidentiality:
| Option | What to do |
|---|---|
| confidential | set the token_endpoint_auth_method to one of the following:
|
| public | set the token_endpoint_auth_method to none |
- Curl
- CSharp
- Dart
- Go
- Java
- Node
- Python
- Ruby
- Rust
/applications1 2 3 4 5curl "https://api-$(REGION).beyondidentity.com/v1/tenants/$(TENANT_ID)/realms/$(REALM_ID)/applications" \ -X POST \ -H "Authorization: Bearer $(TOKEN)" \ -H "Content-Type: application/json" \ -d "{\"application\":{\"display_name\":\"$(DISPLAY_NAME)\",\"resource_server_id\":\"$(RESOURCE_SERVER_ID)\",\"authenticator_config_id\":\"$(AUTHENTICATOR_CONFIG_ID)\",\"protocol_config\":{\"type\":\"oidc\",\"allowed_scopes\": [\"$(SCOPE)\"],\"confidentiality\": \"$(CLIENT_TYPE)\",\"token_endpoint_auth_method\":\"$(TOKEN_ENDPOINT_AUTH_METHOD)\",\"grant_type\": [\"authorization_code\"],\"redirect_uris\": [\"$(REDIRECT_URI)\"],\"token_configuration\":{\"subject_field\":\"$(TOKEN_SUBJECT_FIELD)\",\"expires_after\":86400,\"token_signing_algorithm\":\"RS256\"},\"pkce\":\"s256\", \"token_format\": \"self_contained\"}}}"
/applications/applications/applications/applications/applications/applications/applications/applicationsToken configuration, such as expiration and default allowed scopes, can be modified either through the Beyond Identity Admin Console or through API on application update.