Integrate with KeyCloak
This document provides information on how to configure Beyond Identity as a new OIDC identity provider for your Keycloak instance.
The steps in this guide were tested using KeyCloak v10.0.0.
Prerequisites
Before continuing, make sure you have the following:
-
A Keycloak instance with Administration Console access allowing you to configure a new Identity Provider under an existing or new realm in your Keycloak instance.
-
A Beyond Identity tenant. If you don't have one, reach out to Beyond Identity Support.
Once your tenant has been created with Beyond Identity, you can continue to create an Application.
Configuration
To integrate with Keycloak:
Configure Beyond Identity as an OIDC identity provider
In this step you will create Beyond Identity as an OIDC provider in Keycloak.
- Create an Identity Provider of type OpenID Connect v1.0.
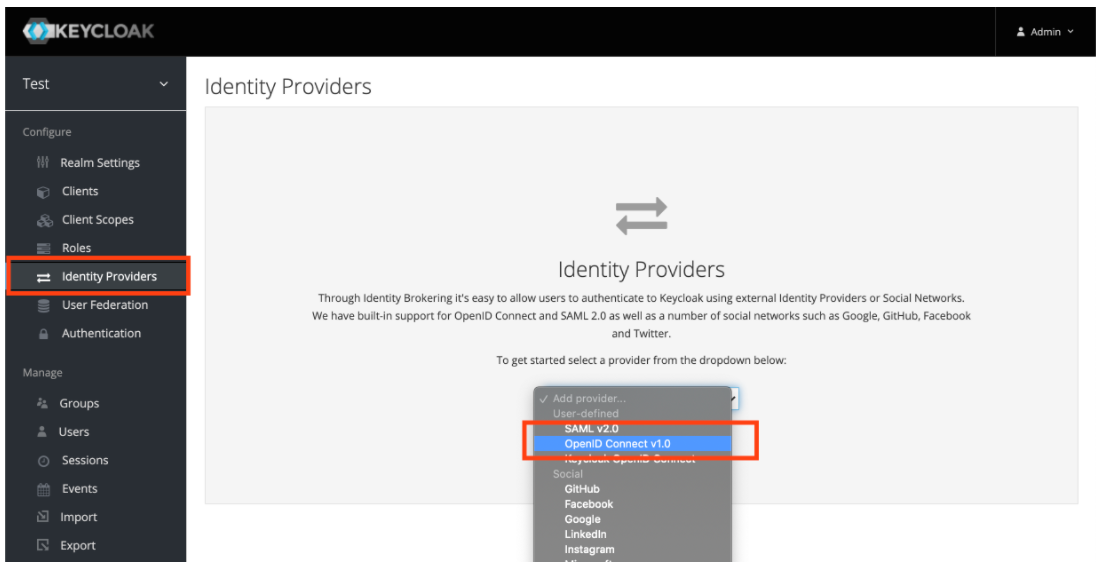
- Configure your new Identity Provider using the values from the table below into the Add identity provider window:
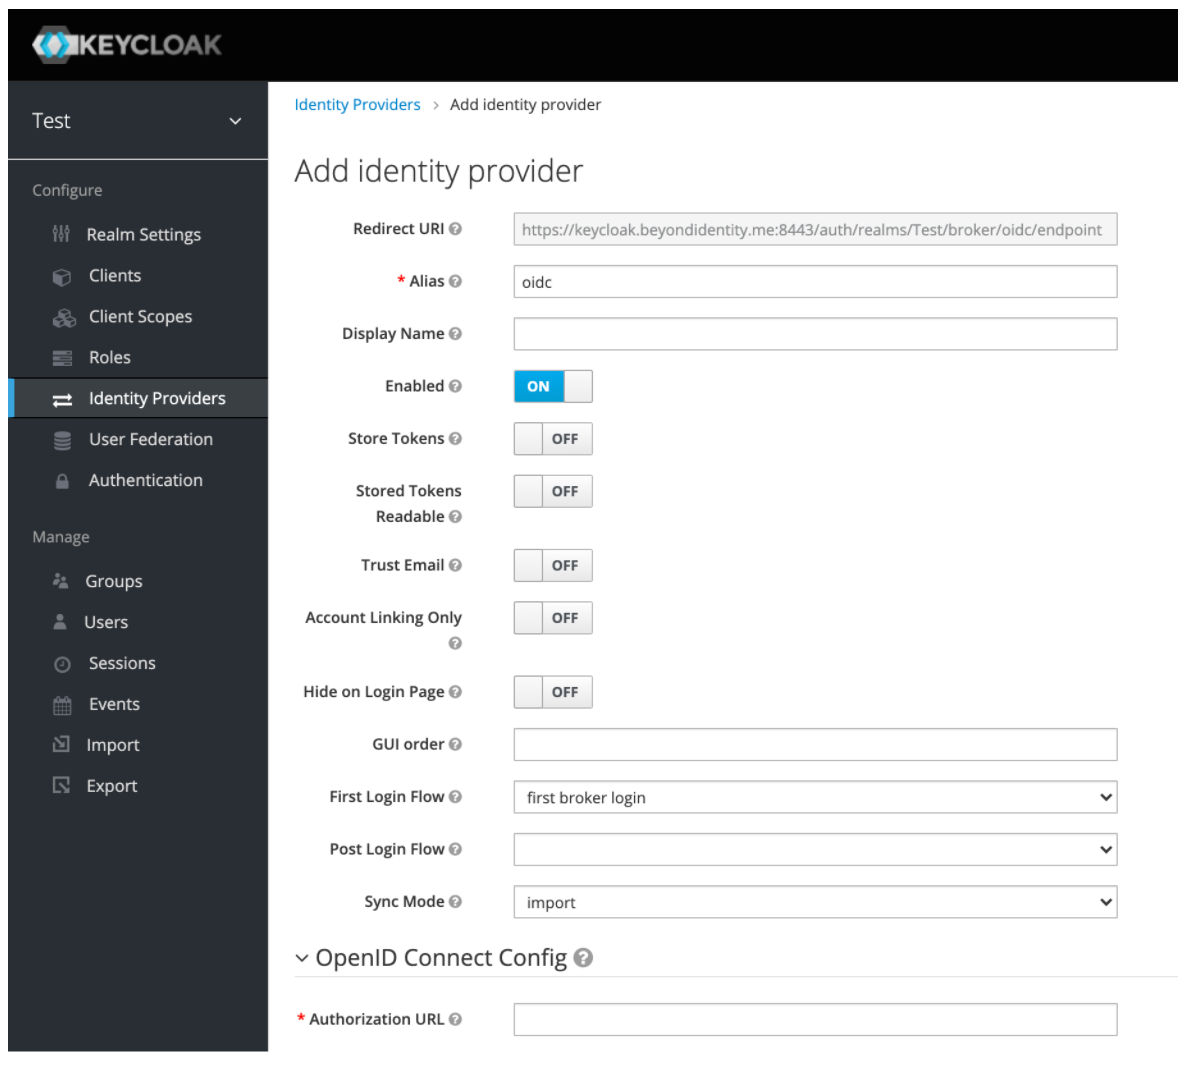
Configuration values
| Name | Value |
|---|---|
| Alias | byndid-oidc |
| Display Name | Beyond Identity |
| Enabled | On |
| Store tokens | Your preferred setting (default: False) |
| Stored Tokens Readable | Your preferred setting (default: Off) |
| Trust Email | Your preferred setting (default: Off) |
| Account Linking Only | Your preferred setting (default: Off) |
| Hide on Login Page | Your preferred setting (default: Off) |
| GUI Order | Your preferred setting (default: empty) |
| First Login Flow | Your preferred setting (default: first broker login) |
| Post Login Flow | Your preferred setting (default: empty) |
| Sync Mode | Your preferred setting (default: import) |
| Authorization URL | https://auth-us.beyondidentity.com/v1/tenants/${tenant_id}/realms/${realm_id}/applications/${application_id}/authorize |
| Pass Login Hint | On |
| Pass current locale | On |
| Token URL | https://auth-us.beyondidentity.com/v1/tenants/${tenant_id}/realms/${realm_id}/applications/${application_id}/token |
| Logout URL | empty |
| Backchannel Logout | Off |
| Disable User Info | On |
| User Info URL | empty |
| Client Authentication | Client secret as basic auth |
| Client ID | Value supplied by Beyond Identity |
| Client Secret | Value supplied by Beyond Identity |
| Issuer | https://auth-us.beyondidentity.com/v1/tenants/${tenant_id}/realms/${realm_id}/applications/${application_id} |
| Default Scopes | openid |
| Prompt | Your preferred setting (default: unspecified) |
| Accepts prompt=none forward from client | Off |
| Validate signatures | Off |
| Allowed clock skew | empty |
| Forwarded Query Parameters | empty |
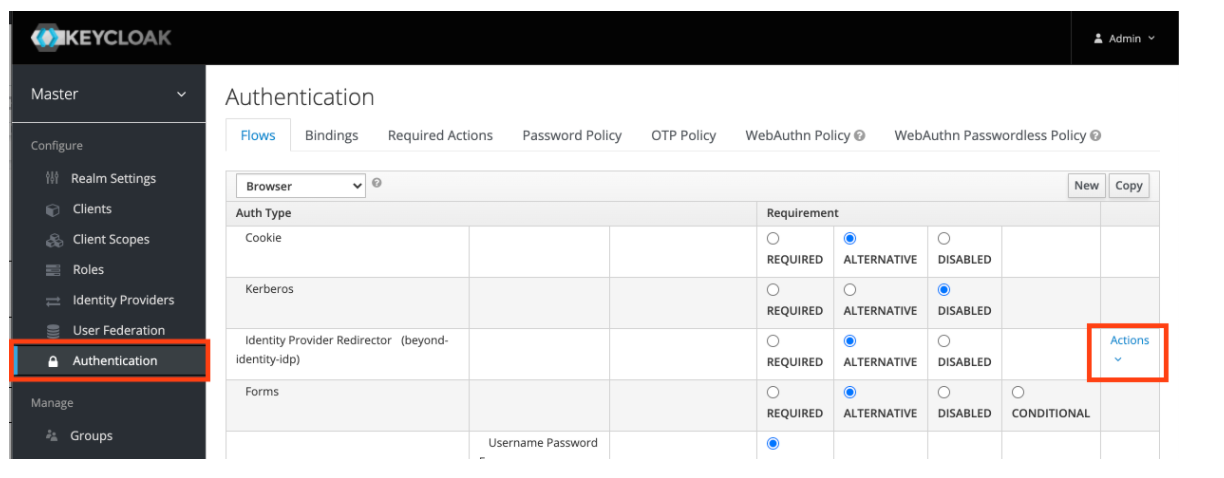
Enable the identity provider
In this step you will enable Keycloak to delegate authorization requests to the newly created Beyond Identity IDP for authentication.
- Navigate to the Authentication configuration page.
- Under Identity Provider Redirector, click Actions > Config.
- Under Alias, type the alias assigned to the Identity Provider created in Step 1 (byndid-oidc).
- Click Save.
Test the integration
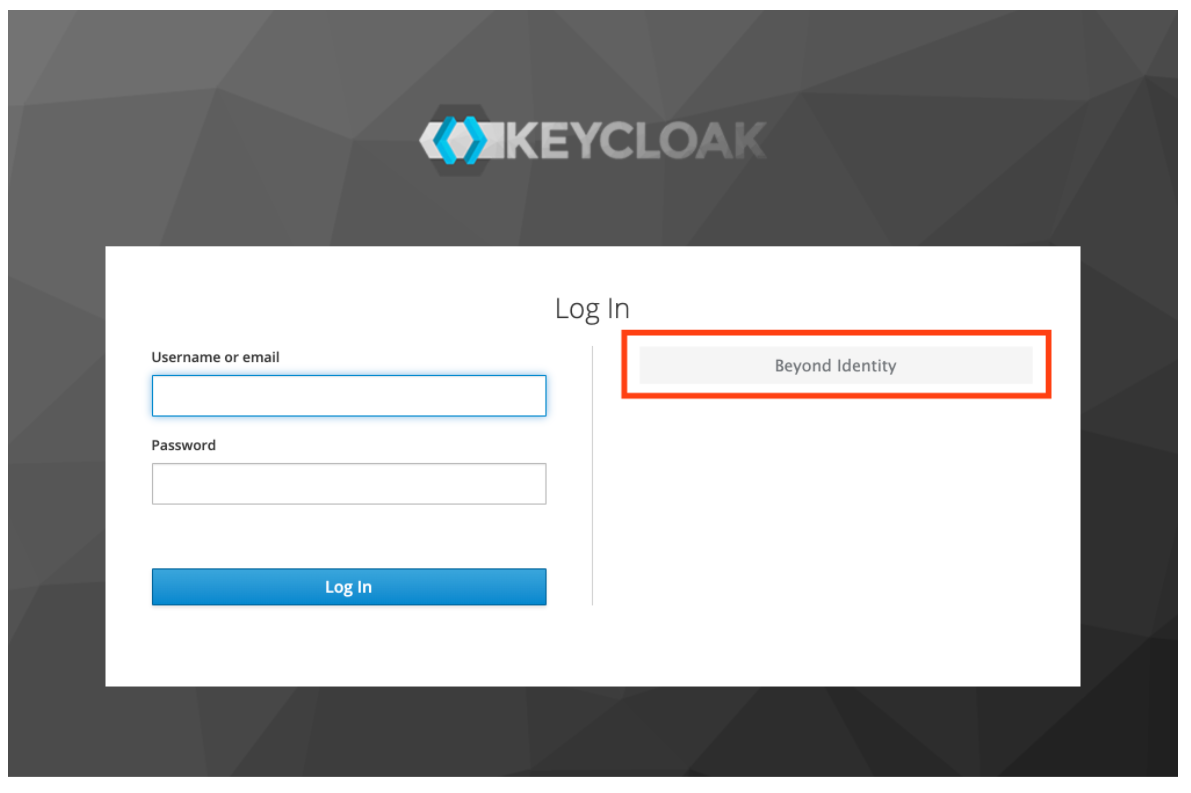
In this step you'll test the integration from Keycloak's own login page.
- Open a new Incognito Mode browser bindow.
- Navigate to the Login Page of the Keycloak realm under which the Beyond Identity Provider was configured above.
- Click the button to login with Beyond Identity.
Token exchange
Token Exchange is Technology Preview in Keycloak and is not fully supported yet. This feature is disabled by default. Refer to the following instructions to enable this feature:
https://www.keycloak.org/docs/latest/securing_apps/#_token-exchange
The following steps are required if you want to embed the Beyond Identity SDKs within native applications. When using the embedded SDK the authentication occurs directly between the native application and the Beyond Identity cloud, if Keycloak is being used as your CIAM SSO, the Beyond Identity user also needs to be authenticated with your SSO.
The token exchange grant supports this flow and is also used in native social authentication scenarios, for example Sign-in with Apple where the authentication takes place natively between the device OS with Apple OIDC server.
You can read more about the use cases for the Token Exchange grant here: https://datatracker.ietf.org/doc/html/rfc8693
Configuring the token exchange
Perform the following steps to configure the token exchange for the Beyond Identity provider created above:
Enable the token exchange permission
In this step, you will enable (grant permissions for) Keycloak to perform token exchange with the Beyond Identity identity provider for particular apps (clients).
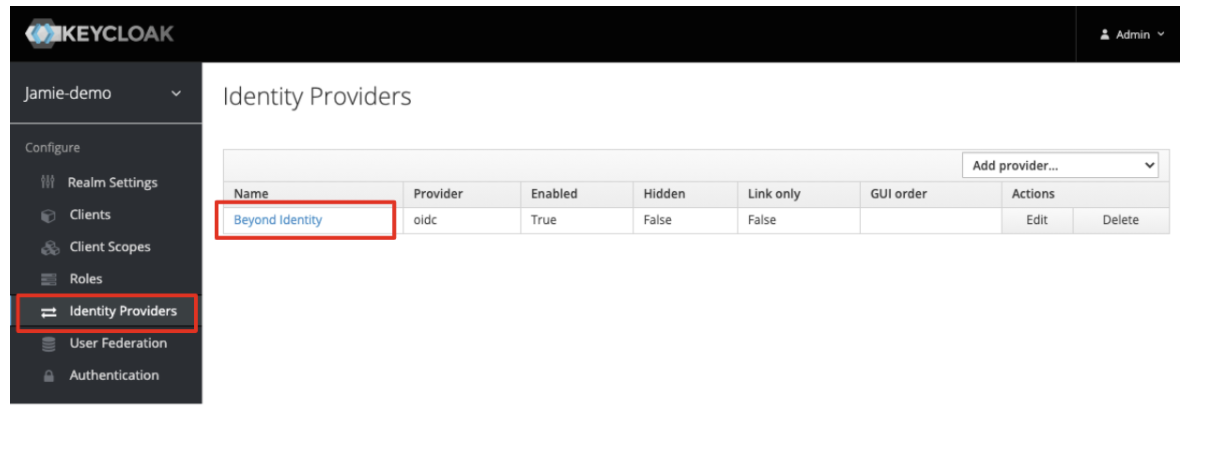
- From the left navigation pane, click Identity Providers.
- When the Identity Providers section loads, choose the Beyond Identity provider from the list as shown below:
- Click the Permissions tab:
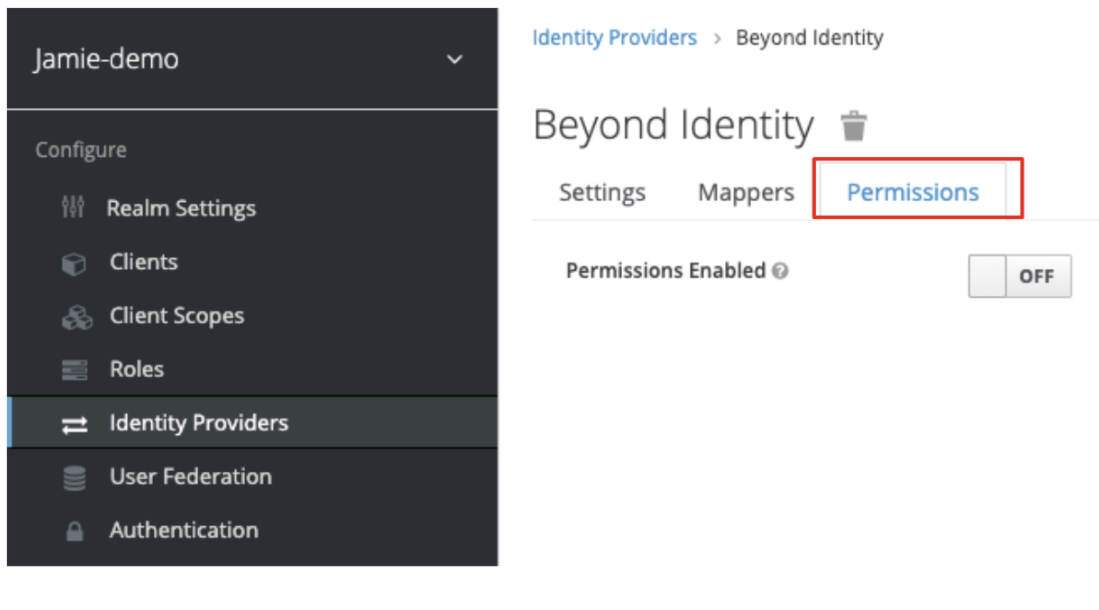
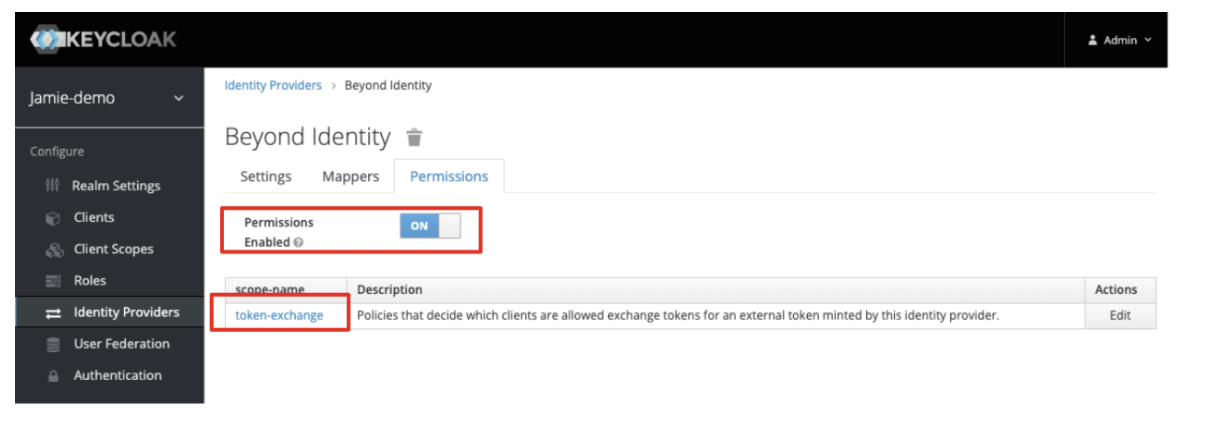
- Toggle the Permissions Enable switch to On and then select the token-exchange option from within the table that appears in the window.
-
From the left side menu, click Clients to open the Clients page. .
-
Click the Create Policy drop-down option associated with Apply Policy highlighted below:
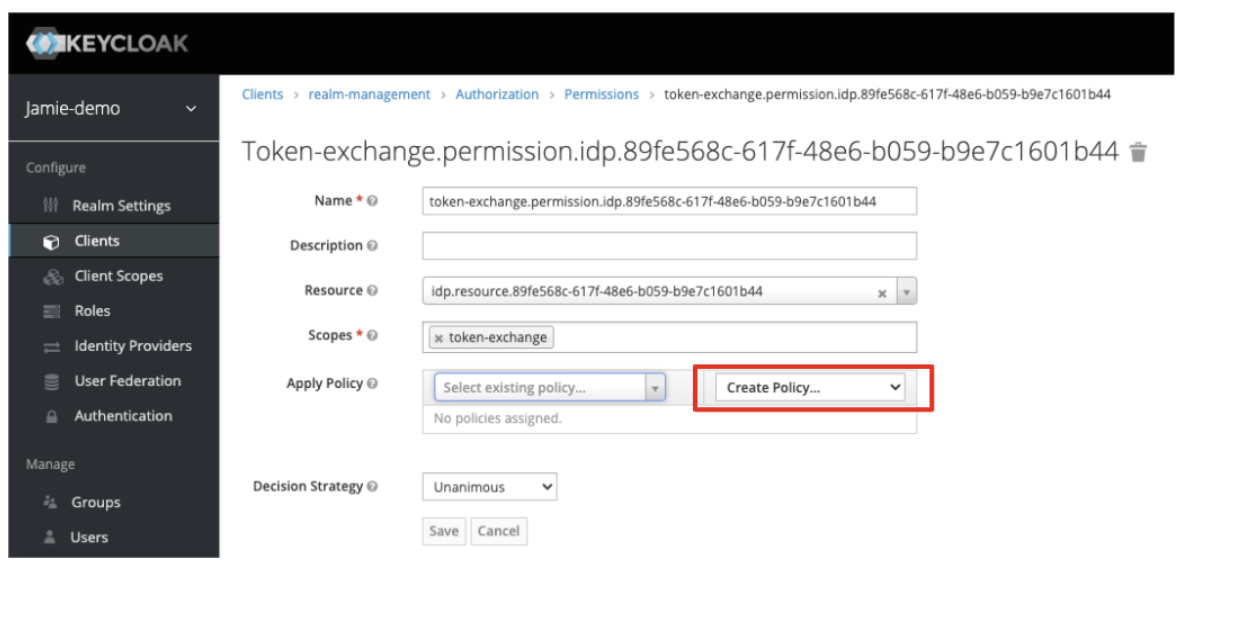
- Select Client from the drop-down list:

Leave the other fields with their default values.
Add a client policy
In this step, you will specify for which clients (apps) Keycloak can get tokens from the Beyond Identity identity provider.
- Enter a Name for the client policy, for example, ‘Exchange Beyond Identity Token’.
- Optionally, enter a description.
- For the Clients field, select the OIDC client from the drop-down list that you want to allow this exchange for (that is, the native app which will allow Beyond Identity tokens to be exchanged).
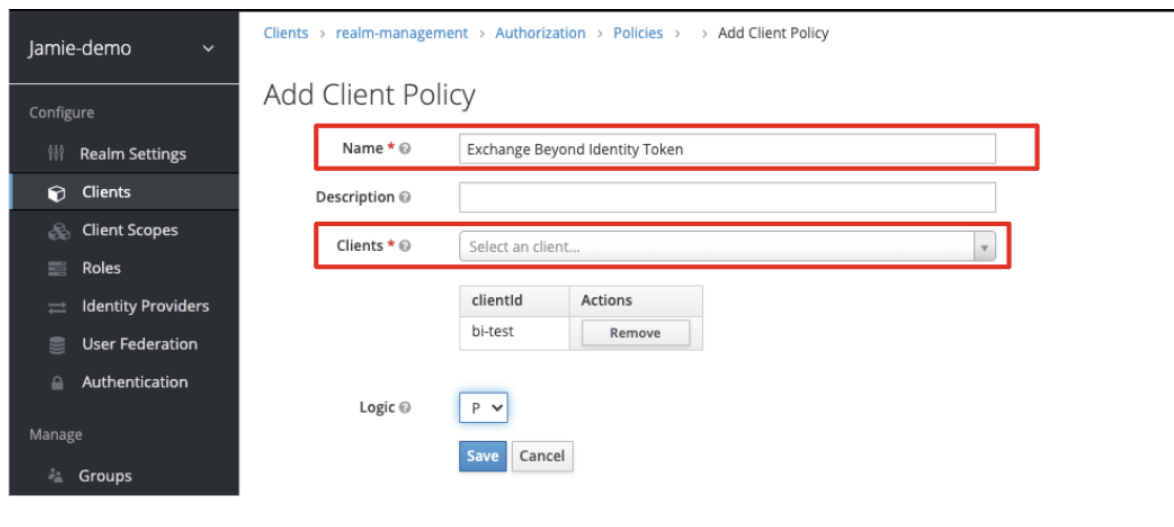
If you have not already created a client for your application you will need to do so.
- Click Save.
The Policy is added to the token-exchange permission from the previous screen as shown below:
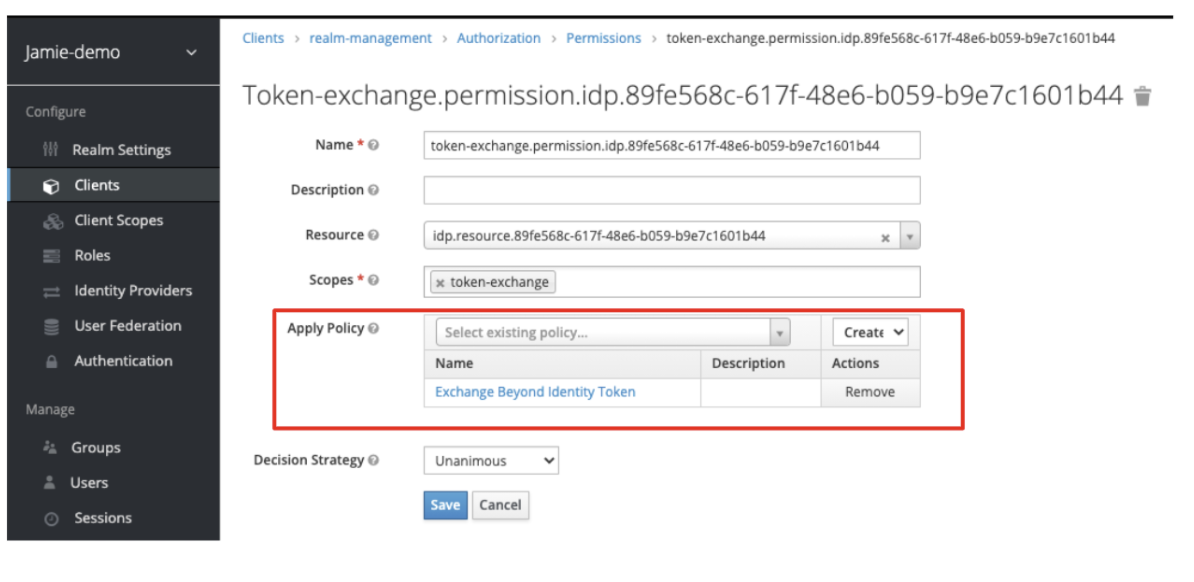
- Click Save.
Setup is now complete.
Testing the Exchange
Once you have completed the above steps, the token exchange permission is ready to test. You can test this with a simple CURL command:
curl -X POST \
-d "client_id=<client_name>" \
--data-urlencode "grant_type=urn:ietf:params:oauth:grant_type:token_exchange" \
-d "subject_token=<Beyond_Identity_issued_access_token>" \
-d "subject_issuer=<name_of_identity_provider_configured_in_keycloak>" \
--data-urlencode "subject_token_type=urn:ietf:params:oauth:token-type:access_token" \
"<https://<keycloack_domain>/auth/realms/demo/protocol/openid_connect/token>
Replace the following placeholders shown above with your information:
<client_name><3rd_party_issued_access_token><name_of_identity_provider_configured_in_keycloak>http://localhost:8080/auth/realms/jamie_demo/protocol/openid_connect/token
For more information on token exchange configuration, see the Keycloak documentation:
https://www.keycloak.org/docs/latest/securing_apps/#external-token-to-internal-token-exchange